The “DOMAINS” section of cPanel is your go-to place when you want to add a new domain name (the one you’ve just purchased) to your hosting account, manage your existing domains, as well as set up subdomains.

The “DOMAINS” section of cPanel is your go-to place when you want to add a new domain name (the one you’ve just purchased) to your hosting account, manage your existing domains, as well as set up subdomains.

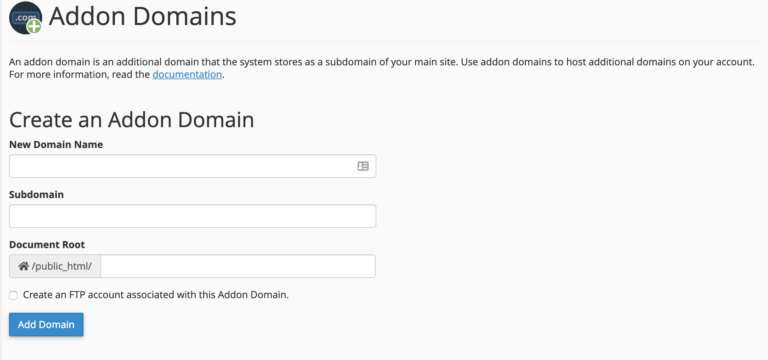
To add a domain name to your cPanel (and thus, your hosting package), you’ll need to click on “Addon Domains” in the “DOMAINS” section shown above.
An addon domain is a fancy name for a standard domain name that you can use to create a fully-functional website – meaning you can host multiple domain names from the same control panel.
On the “Addon Domains” screen, you’ll be asked to enter your new domain name plus a couple of other parameters:

On that same “Addon Domains” screen, there’s a section called “Modify Addon Domain” where you can take care of any domains currently assigned to your account – this includes managing them, setting redirections, or removing domains completely.

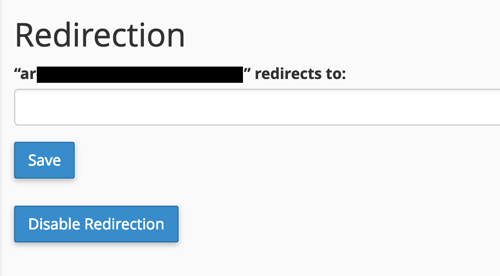
The usage here is straightforward. There are links for removing and managing the redirections on the right. Clicking on any of them will show you another settings panel where you can confirm the deletion or enter the destination that you want to redirect the domain to.
Every time you add a new domain to your account (covered above), cPanel will also create a corresponding subdomain to go alongside. Here’s how that usually works, based on an example:
Let’s say your cPanel account name is "john" and the host is called "superdooperhost.com". In that case, your primary server domain is going to be "john.superdooperhost.com". Once you add a new addon domain, say, "johns2.com", cPanel will also create a subdomain called "johns2.john.superdooperhost.com".
Now, what’s unfortunate about such a setup is that this new subdomain often holds a carbon copy of your normal website that’s available under johns2.com. In other words, you get the same website available twice, under two addresses: "johns2.com" and "johns2.john.superdooperhost.com".
This is not ideal from an SEO point of view. To fix that, what you should do is redirect that new subdomain to your standard domain. To say it another way, after doing that, whoever tries to go to "johns2.john.superdooperhost.com" will be automatically redirected to "johns2.com".
Here’s how to do that:
First, click on “Subdomains” from the “DOMAINS” section:

You’ll be taken to a panel where you can see all of your current subdomains that have been set up.
At this stage, the “Redirection” column is likely blank.

To edit that, click on the “Manage Redirection” link next to the subdomain you want to edit. On the next screen, set up the redirection by entering the full domain name that you want to redirect to. In our example, that’s johns2.com. Click on “Save” when done.

Subdomains are not only about causing minor inconveniences but also about letting you expand certain areas of your site in a creative way.
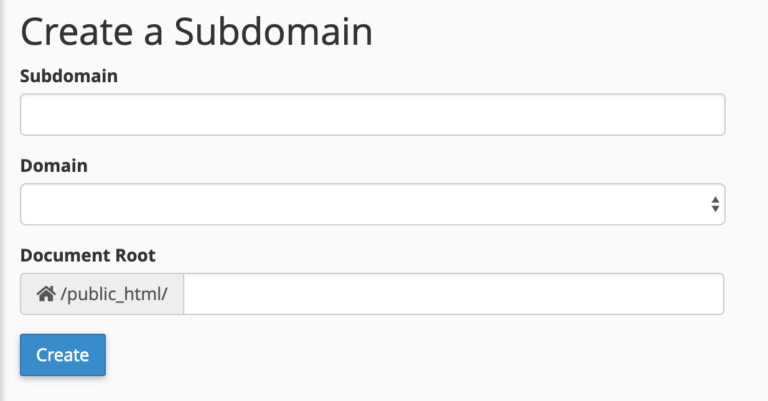
For example, if you want to launch a new blog as part of your website, a good approach is to do that under a subdomain. For instance, if your main website is, again, at "johns2.com", then you could consider launching a blog under "blog.johns2.com".
In this case, "blog" is just an example. You have full freedom to choose whatever subdomain you want.
You can create a custom subdomain on the same screen where you took care of managing the existing ones. Just fill out the form that’s at the top.
